Monday, December 31, 2012

Pfannkucken-German Pancakes :)

  This is probably the 3rd time I've made German Pancakes for breakfast.  They've become one of my favorite with how versatile they can be.  You can put butter and syrup on yours, slice some fruit and a little powdered sugar, or take the savory route and do sour cream and cheese.  This morning I got up and made myself a cup of coffee and got started.  This recipe comes from Smitten Kitchen, a cute little blog that I've really come to like.  You can find her recipe for German Pancakes here
  Through trial and error I have found that it is absolutely necessary to preheat your oven to 400* and have it COMPLETELY PREHEATED.  Also, your ingredients need to be fairly close to room temperature.  If your oven isn't hot and your ingredients are cold, your pancakes won't fluff up and curl.  They will still taste pretty good but they aren't as pretty.  
  So here we go.  You will need:
                                   4 eggs- room temperature
                                   2/3 cup of flour
                                   2/3 cup of milk room temperature
                                   2 tbs of butter-room temperature, softened
                                   1 tbs of sugar
                                   1/2 tsp of salt
                                   Food processor or a whisk
                                   2 9 inch cake pans.
   According to her blog's reviews, this can be done easily with a whisk, but I just love the excuse to use my food processor, and it does all the work for me :) 


Start by getting your (4 room temp) eggs really nice and fluffy and light yellow. After that, add everything else and get it all very well incorporated. You don't have to worry about over mixing because you want a nice smooth batter. 


Almost done :) This literally took like 2 minutes. 


Put batter in your greased cake pans.  This recipe makes 2 9 inch pancakes but I stretch mine and make 2 9 inch and one small one for Ashton.  Bake your pancakes (in your hot oven) for 15 minutes on 400 and then decrease the temp to 350 and bake for about another 15 minutes.  


Go find a cute little (almost) 2 year old and watch him play while you drink your coffee and your pancakes do their magic. 


Pull 'er out of the oven and gaze... And then decide what you're gonna top 'er with.  


Chris likes his with mini chocolate chips, powdered sugar and syrup. :)

Happy New Year! 


Thursday, December 27, 2012

Flour-less, egg-less, (almost) sugar-less Cookies :)

  Now before I start I have to ask all of you to PLEASE keep an open mind :).  I came across this recipe over the summer on Pinterest.  The caption was "Flour-less, egg-less, sugar-less cookies."  You can find the original recipe here. One day out of pure boredom I went ahead and tried them and to my amazement, they were great! My friend Katie told me that they may not be your typical chocolate chip cookie but they are perfect for curbing your sweet tooth.  They are easier to put together as you just use a food processor and THAT'S IT.  Pretty easy clean up if you ask me. 


Chris did most of the work on this one.  :) So I'm guessing you want to know what's in them right? 

You will need: 
1 can of Garbanzo Beans/Chick Peas
1/2 cup of peanut butter
1/4 cup of honey or agave nectar
1 tsp of baking powder
1 pinch of salt if your peanut butter isn't salted
2 tsp vanilla 
1/2 cup of chocolate chips

Preheat your oven to 350*

Are you with me still? Ok so that's 1 can of GARBANZO BEANS.  Give them a good rinse and then put them in your food processor and get them started.  Unless you want chunks of the bean in your cookie you're going to want to scrape the sides of the blender and blend these babies good. 
You can add everything else (except the chocolate chips) until everything is well blended.  After it's looking pretty smooth, take your blade out and stir in 1/2 cup of chocolate chips.  You can use whatever you want.  If you want to be REALLY healthy you can use a semi-sweet or dark chocolate because milk chocolate chips are higher in fat.  You can be like Chris and "accidently" dump a whole cup in. :) 
Next, you'll need to wet your hands with water and get to rolling your cookies.  I lined a cookie sheet with foil and very lightly greased it because I couldn't remember if these stick or not.  You can put these pretty close together because they don't rise and don't spread very much at all. 
Set your timer for about 10 minutes. 


Next, tell your toddler that we are going to have cookies for snack and this will happen:


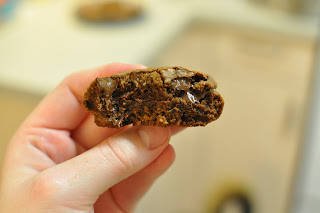
Pull them out of the oven and let them sit a minute.. One thing to remember is that these taste the best when they are warm :) 


"Success"

Now go get yourself some garbanzo beans and make these and let me know what you think ::)


Tuesday, December 25, 2012

Stromboli

These pictures have been sitting on my camera for weeks now. The night I was supposed to blog this Chris came home and told us that he's more than likely deploying in the Spring. :( For a while I've been in a slump and haven't taken many pictures but I'm definitely going to make the effort to get more stuff on here :). So here it goes. 
  Stromboli is a family favorite in our house.  It's basically a rolled up pizza and it's the easiest thing to put together.  What I love about this recipe is you can put in or take out whatever you'd like.  


Preheat your oven to 400.  My pizza dough is hiding under my veggies.  I choose to make it homemade because it's pretty easy.  You can use whatever dough you like, whether it be in a can or package. 

1 cup of lukewarm water
1 packet of yeast
2-3 cups of flour
1 tbs sugar
seasonings if you'd like: oregano, basil, thyme.

Mix your water and yeast together and let it sit in a cup for about 5 minutes to activate.  It's important to remember that your water can't be too cool or the yeast won't activate and it can't be too hot or it will "kill" the yeast. 
Add all other ingredients and let the dough sit, covered for 20 minutes. 


Throw some pizza sauce, toppings and plenty of cheese on there.

Roooolll her up..


Make a few slits in the top.. The one thing I forgot to do tonight was brush an egg wash on top so it'd brown nicely.  

Bake her for about 10-15 minutes


Enjoy! 


Monday, December 3, 2012

Giant Double Chocolate Cookies

Here's another favorite recipe for our family.  All three of us consider chocolate part of the family.  This recipe comes from annies-eats.com.  This lady created every chocolate lovers dream.  Let me stop talking about it and get to it. 

You'll need: 
   2 sticks of cold butter, cubed
   1 1/4 cups of sugar
   2 large eggs
   1/2 cup of cocoa 
   2 1/4 cups of flour
   1 tsp baking powder 
   1/4 tsp salt
   2 1/2 cups of chocolate chips


Preheat oven to 350.

Cream your butter and sugar together.  Since the butter is cold this will take longer than normal (3-4 min).  It actually won't really start to cream very well until you crack your eggs in (one at a time.)
Add the cocoa and mix until it's very well blended.  
When everything is well incorporated, slowly add the flour, powder and salt.  The dough is going to get REALLY THICK.  Have a big strong person come and stir in your chocolate chips, or do it yourself and be awesome. 

Use a lightly greased cookie sheet and start ploppin that dough down.  I like to make them big.  One thing to keep in mind is that they don't spread out very far so you can put them somewhat close together.. I forgot about that.

And then, you have this.. This soft, moist, melty and yummy creation. :) 


Enjoy!


Cheesy Chicken and Wild Rice Casserole

  One of my favorite blogs is the Picky Palate.  This woman is a mother of three boys and LOVES to cook and bake.  The first ever recipe I tried by her were Kiss Pies last Thanksgiving.  Which makes me think I'll have to try them again soon.  But anyways, the first dinner I stumbled across happened to be Cheesy Chicken and Wild Rice. http://picky-palate.com/2010/09/13/cheesy-chicken-and-wild-rice-casserole/ It has become a staple in our home.  It's actually a very healthy recipe minus all of the cheddar cheese.  But seriously, if you are looking for a kid friendly recipe that has vegetables, this is the one for you. 
  Although this recipe is not at all hard to put together, the one downfall is the half hour it takes to cook your chicken and rice, and chop your veggies.  How you cook your chicken is up to you.  You can bake it, cook it in a skillet or poach it in a pot of water/chicken stock.  The recipe calls for two different kinds of rice: wild and white rice.  I use brown rice because it is much healthier for you. This also requires time and two bowls or pans to cook these rices.  You can easily make a shortcut by getting quick cooking rice, using all wild rice, all white rice, or all brown rice.  It's really up to your palate and time schedule.  
  The easiest way to consolidate these tasks is to do as follows.  Poach/Bake your chicken for 30 minutes at 350.  As soon as your chicken goes in the oven, start your wild rice on the stove top.  Most I've found take about 25 minutes. As soon as that's done chop your veggies and then as soon as your done start your Minute Brown Rice in the microwave.  It should all be done at the same time. 

So.. here it goes. 

Here's just about everything you need. Besides salt, pepper, and flour. 
You'll need:
1 box of wild rice
2 cups of cooked brown/white rice
2 cups of shredded/chopped cooked chicken
1 medium size onion, diced
3 stalks of celery, diced
3 carrots, diced
1 clove of garlic, minced
 1/2 tsp salt 1/2 tsp pepper

For cheese sauce:
4 tbs butter
1/4 cup flour
2 cups of chicken stock
2-3 cups of cheddar cheese, shredded


Put your veggies into a hot skillet with a few tablespoons of butter, oil, or olive oil.  I use olive oil for just about everything.  Cook them until they're soft, for about 10 minutes.  Unless you like your veggies crunchy it's very important to let them cook for at least 10 minutes. 
Add your shredded chicken, salt and pepper and stir all of that yummy goodness together for a few minutes. 

Here is the part that's up for negotiation.  You can add the rice into your pan or put the rice and chicken-veggie mixture into a big bowl like I did. 


Now it's time to make that yummy cheese sauce.  Melt butter in a medium saucepan and make a roux with the flour. SLOOOOOWLY add the chicken stock, whisking constantly.  Give it a few minutes to do it's magic and thicken and then take it off the heat and stir in your cheese until it's all creamy and dreamy looking. Put this whole gooey mixture in a greased 9x13 casserole dish and sprinkle with some more cheese and bake for 20-30 minutes at 350.  


Ashton and Chris and I gobble this up every time.  It makes really good leftovers as well.  It's got lots of good stuff in it and it's sure to be a crowd pleaser.  


Saturday, December 1, 2012

Pumpkin-Peanut Butter-Banana-Homemade Dog Treats :)

  Yesterday I was reeeeally wanting to make something while Ashton was napping.  Much of what I wanted to make required a mixer.. That just made me really depressed because my mixer is about to die.  Last time it was used was on Thanksgiving for mashed potatoes and it sounded like it was going to explode.  So needless to say I was looking for something that I could do by hand and stumbled upon these dog treats.  The recipe was changed just a tad but all credit goes to the lady at this site.


I took one look at Remi and decided to get in the kitchen :).


Here's the line up... Sans a banana and cookie cutter :) 
You'll need: 2 1/2 cups of whole wheat flour.  (After some research I found that dogs can tolerate All Purpose Flour just fine and people use whole wheat flour for the added nutritional value.  I could have waited but I REALLY wanted to see how these would turn out.)
2 eggs, 2 tbs peanut butter, and 1 cup of pumpkin.
You can also add banana, and honey if you'd like :) The recipe is really one of those take out put in type of things.  If I had oats on hand I would have put some of those in.  

(PREHEAT OVEN TO 350)


Since I didn't have a mixer, I did most of the combining with a fork and it worked very well.  Until finally I sprinkled some flour on the counter and did it by hand.  Once everything was incorporated, the dough got very STICKY so I used a lot of flour for dusting.  


Roll it out to your desired thickness and use a cookie cutter. These don't rise or expand at all so putting them close together on a (lightly greased) cookie sheet close together is fine. 


In they go for about 30 minutes :)


Aren't they cute?


It was nearly impossible to get a good picture of Remi because she ate them so fast :) 


Store in an airtight container! I have/had about double what you see here.  

Hope ya'll enjoy!! 


Thursday, November 29, 2012

Peaches and Cream Muffins

  I've been wanting to try these Peaches and Cream Muffins for quite some time now, but it always seems I'm out of one of the necessary ingredients.  So today when Chris called me and said he was on his way home I said "Pick up some sour cream from the store on your way home so I can make those muffins!"  Lately I've been trying to steer away from Pinterest (just a little) and dive into my cookbooks.  I received The Deen Brothers Cookbook from my dear friend Katy and I haven't been disappointed with a single recipe I've tried.  So far, not many of the recipes require slaving in the kitchen over a hot stove and as a mom of a toddler, I LOVE that.  
    So here it goes!

Here is your line up, looks easy right? It took less than 5 minutes for me to mix up :) 
You'll need:
A cute little 2 year old to help mix everything together :)
2 cups of self rising flour
2 sticks of butter softened/melted
1 cup of sour cream
1/4-1/2 cup of sugar (I added a little brown sugar
1 tsp vanilla
1 15 oz can of peaches-diced into small pieces
I also added about a 1/4 cup of the peach juice
Baking cups or cooking spray


Preheat your oven to 350 degrees.  Mix the flour, sugar, butter, vanilla, sour cream in a medium sized bowl until well combined.  Try not to over mix.  


Gently fold in your peaches.  


Fill your muffin cups to the brim.  They rise but not much.  Put them in the oven for 30-35 minutes or until a toothpick comes out clean.  It's VERY important to take these out GENTLY and carefully set them down so they do not fall.


Let them cool for 5 minutes, or as long as you can handle before grabbing a cup of coffee or a glass of milk and digging in!